Learning how to trim your cat’s nails doesn’t have to feel like a fight. With patience and the right approach, you can turn this essential grooming task into a calm routine. This guide breaks down everything you need to know, from choosing tools to handling a nervous cat. Follow these simple steps to keep your cat’s claws healthy and your furniture scratch-free!
Key Takeaways:
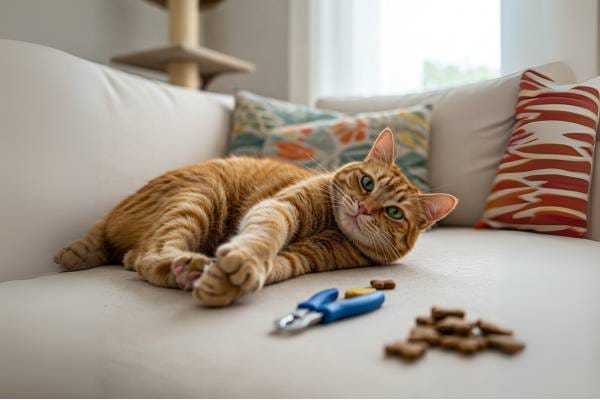
- Make nail trimming a positive experience by offering treats and starting with short sessions when your cat is calm and relaxed
- Use proper cat nail clippers and only cut the white tip, avoiding the pink quick to prevent bleeding and pain
- Gradual training and patience are necessary – start by touching paws during petting sessions before attempting to trim nails
Understanding Cat Nail Care
The proper care of your cat’s nails is an important aspect of their overall health and well-being. As a responsible cat owner, you’ll need to understand both the structure of your cat’s nails and the importance of regular maintenance to ensure your feline friend stays comfortable and healthy. Regular nail care prevents various issues and helps maintain a harmonious relationship between you and your pet.
Why Learning How to Trim Your Cat’s Nails Matters
For your cat’s comfort and safety, maintaining properly trimmed nails is a necessity. When left untrimmed, your cat’s nails can become overgrown, leading to painful ingrown nails, difficulty walking, and potential injury from getting caught in carpet or furniture. Regular trimming also protects your home furnishings from excessive scratching damage and reduces the risk of accidental scratches during play or handling.
Basic Anatomy of Cat Nails
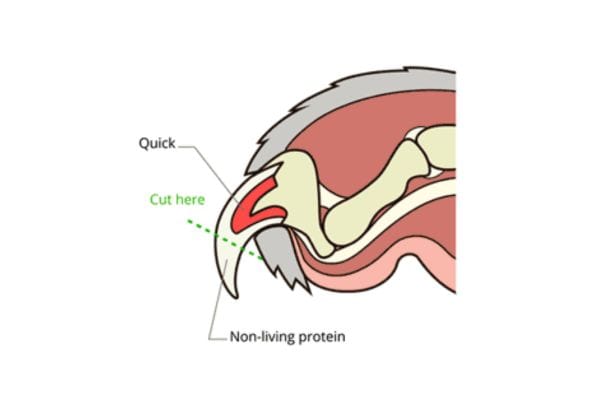
On each paw, your cat has several retractable claws that contain a pink area called the quick, which houses blood vessels and nerves. Understanding the location of the quick is vital for safe nail trimming, as cutting into this area can cause pain and bleeding. You’ll notice that your cat’s nails are naturally curved and become more pronounced as they grow.
This anatomical structure allows your cat to retract their claws when not in use and extend them for activities like climbing, scratching, and self-defense. The outer layer of the nail is made of keratin, the same material as human nails, but it grows in layers that can become frayed or split if not maintained properly.
Essential Tools and Preparation
Some cats can be resistant to nail trimming, but having the right tools and preparing properly will make the process smoother for both you and your pet. Before learning how to trim your cat’s nails, gather all necessary supplies and create a calm environment where your cat feels comfortable and secure. This preparation phase is necessary for a stress-free experience.
Choosing the Right Nail Clippers
While there are several types of nail clippers available for cats, the two most common options are scissor-style and guillotine-style clippers. You’ll find that scissor-style clippers offer better visibility and control, making them ideal for beginners. These clippers allow you to see exactly where you’re cutting and provide a clean, precise cut without crushing the nail.
Additional Supplies Needed
On top of quality nail clippers, you’ll need a few more items to ensure a successful trimming session. Keep styptic powder or cornstarch nearby to stop any bleeding if you accidentally cut the quick. A treat pouch filled with your cat’s favorite rewards will help create positive associations with the nail-trimming experience.
Another helpful item to have on hand is a small towel or blanket that can be used to gently wrap your cat if they become anxious during the process. You might also want to keep a flashlight nearby to help you better see the quick inside darker nails, and having a grooming partner to help hold and comfort your cat can make the process much easier.
| Required Items | Preparation Steps |
| – Cat nail clippers – Styptic powder – Treats – Towel | – Choose quiet location – Gather all supplies – Have treats ready – Set comfortable lighting |
Creating a Calm Environment
For successful nail trimming, establishing a peaceful atmosphere is imperative to keep your cat relaxed and cooperative. Start by choosing a quiet room away from other pets and household distractions. Before beginning the process, review a comprehensive How to Trim Your Cat’s Nails: Step-By-Step Tutorial to ensure you’re well-prepared with the right tools and techniques.
Selecting the Perfect Time and Place
Calm and sleepy moments, such as after a meal or during your cat’s regular nap time, are ideal for nail trimming. Choose a comfortable spot where your cat naturally likes to relax, such as their favorite cushion or your lap. Make sure the area has good lighting so you can clearly see the quick (the pink part of the nail containing blood vessels) while trimming.
Positive Reinforcement Techniques
Techniques for positive reinforcement should begin well before the actual nail-trimming session. Start by getting your cat comfortable with having their paws touched during regular petting sessions. Offer treats and gentle praise when they allow you to hold their paws, gradually increasing the duration of contact.
Positive associations can transform nail trimming from a stressful experience into a bonding opportunity. Keep your cat’s favorite treats nearby, and reward them frequently throughout the process. You can also use special treats reserved only for nail trimming sessions, making the experience more appealing to your feline friend.
Step-by-Step Trimming Process
Not all cats enjoy having their nails trimmed, but with the right approach and patience, you can make this necessary grooming task much easier. Before you begin, ensure you have all the required tools within reach and create a calm environment for both you and your pet.
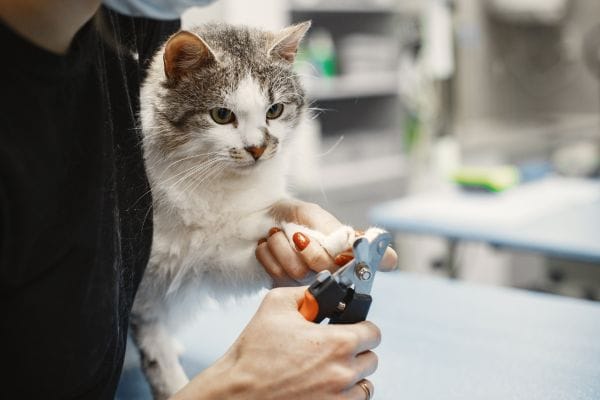
Proper Handling Techniques

Some cats feel most comfortable sitting in your lap while others prefer being placed on a table or stable surface. You can wrap your cat in a towel if they tend to squirm, leaving only one paw exposed at a time. This “purrito” method helps keep them secure and calm during the trimming process.
1. Identifying the Quick (pink area)
Techniques for locating the quick in your cat’s nails involve looking for the pink area within the translucent nail. You should aim to cut approximately 2-3 millimeters away from this pink area to avoid causing any discomfort or bleeding.
Another helpful method is to shine a light behind the nail, which makes the quick more visible. If your cat has dark nails, you’ll need to be extra cautious and cut only the curved tip of the nail.
2. Correct Cutting Angle
To achieve the best results, hold the clippers at a 45-degree angle to the nail. This position allows you to make a clean cut while maintaining the natural shape of your cat’s nails. Make sure you have a firm but gentle grip on your cat’s paw, pressing slightly on the pad to extend the nail.
Angle selection is particularly important as cutting straight across can lead to splitting or jagged edges. By maintaining the proper angle, you help ensure your cat’s nails remain strong and healthy while reducing the likelihood of catching or snagging on fabric.
3. Common Challenges and Solutions
Now that you understand the basics of nail trimming, it’s important to address some challenges you might face. Many cat owners encounter difficulties during nail trimming sessions, but with the right approach and patience, these obstacles can be overcome. Your success in nail trimming depends largely on how well you can adapt to your cat’s individual personality and needs.
Dealing with Resistant Cats
Common resistance behaviors include pulling away, hiding, or even becoming aggressive when you attempt to trim their nails. You can manage this by starting with short handling sessions, rewarding your cat with treats, and gradually introducing the clippers without cutting. If your cat shows signs of stress, take a break and try again later, making sure to maintain a calm and positive environment.
Managing Anxiety and Stress
Stress during nail trimming can manifest in various ways, from your cat freezing up to trying to escape. You can reduce anxiety by choosing a quiet time and place for the trimming session, using positive reinforcement, and maintaining a gentle approach. Consider wrapping your cat in a soft towel if they feel more secure this way, leaving only the paw you’re working on exposed.
To make the experience more pleasant for both you and your cat, try scheduling nail trims after playtime or meals when your cat is naturally more relaxed. You can also use calming aids like pheromone sprays or diffusers in the room where you’ll be trimming. Breaking the session into smaller parts, perhaps doing just one or two nails at a time, can help your cat build tolerance and trust in the process.
Aftercare and Maintenance
Unlike other grooming tasks, nail trimming doesn’t require extensive aftercare. After you’ve finished trimming your cat’s nails, reward them with treats and praise to reinforce positive associations with the experience. Keep your trimming tools clean and stored safely for the next session, and take note of any challenges you encountered to improve your technique for future trims.
Frequency of Trimming
If you’re wondering how often to trim your cat’s nails, the general rule is every 2-3 weeks. However, indoor cats might need more frequent trimming as they don’t naturally wear down their nails through outdoor activities. You’ll need to adjust the frequency based on your cat’s lifestyle, age, and how quickly their nails grow.
Signs of Nail Problems
You should regularly inspect your cat’s nails for any signs of issues during grooming sessions. Watch out for splitting, cracking, or any unusual coloration that might indicate infection. If you notice your cat’s nails are brittle or growing in unusual directions, these could be signs of underlying health issues that require veterinary attention.
It’s important to pay attention to your cat’s behavior around nail-related issues. If your cat shows signs of discomfort while walking, excessive licking of their paws, or reluctance to use their scratching post, these could indicate nail problems that need addressing. Should you notice any of these symptoms, schedule a check-up with your veterinarian to ensure your cat’s nail health.
Summing up
With these considerations in mind, you can now approach nail trimming with confidence and make it a positive experience for both you and your cat. By following how to trim your cat’s nails step-by-step process, using the right tools, and maintaining patience throughout the procedure, you’ll find that regular nail maintenance becomes a manageable part of your cat care routine. Your consistent, gentle approach will help build trust and make future trimming sessions increasingly smoother.
Your dedication to proper nail care not only protects your furniture and prevents accidental scratches but also contributes significantly to your cat’s overall health and comfort. As you continue to practice these techniques, you’ll likely notice your cat becoming more accepting of the process, turning what might have seemed like a challenging task into a bonding opportunity with your feline companion.
Complete your knowledge to take care your cat by read our article: How Often Should You Bathe Your Cat? Tips for Different Breeds